Now, you are ready to draw. Feel free to post any comments or questions below.
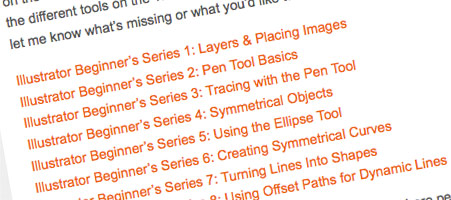
Illustrator Beginner’s Series 2: Pen Tool Basics
| This is the second part in my Adobe Illustrator Beginner’s series.
This tutorial is about drawing with the Pen tool. The Pen tool is
Illustrator’s workhorse. It takes time to learn how to use, but is one
of the key drawing tools in Illustrator. Once you master the pen tool
you will be able to use it in projects you send to online printing services. The best way to learn the Pen Tool is to trace over sketches. Before we get to that, this is a basic overview of the pen tool. |
Before you start using the Pen tool, you’ll want to set your colors.
Illustrator has two color options the Fill color (the color inside a
shape) and the Stroke color (or the outline color). I like to draw with a
Stroke color and no Fill color. You can change the colors of the Fill
and Stroke on the Toolbar using the Swatch palette. To get the Swatch
palette, go to Window > Swatches.
After your Swatch palette is open, click on the color you want. I
chose black. Notice you are editing either the Stroke or the Fill based
on which one is on top on the Toolbar. To edit the other one , click on
the one underneath (either the fill or the stroke). It will move to the
front, then click on a swatch in the Swatch palette for that one. The
white swatch with the red line through it is no color.
|
|
|
| Now, on to the Pen tool. This is the pen tool on the Toolbar. |
|
|
| The pen tool works by placing anchor points down and drawing lines in
between them. Click on the artboard (the area of the file you draw on)
with the pen tool selected. You’ll notice a point appears. |
|
|
| Now click on another place on the artboard. Another point appears and a line is drawn between the two points. |
|
|
| Next, make a third point. |
|
|
Finally, conect the third point to the first. To do this you’ll need
to click on the original point. Hover your tool tip or mouse pointer
over the original point. You’ll know you’re over the point when a small
circle appears next to your pen tool, then click on the point. Your line
or path is closed.
Congratulations, you have just made a shape with the Pen tool. Look out Picasso! You’ve created a lopsided triangle. |
|
|
| Let’s make a curved line now. Make your first point. Then, make your
second point, but don’t release the mouse. Instead, drag the mouse
downward or upward slowly. You’ll notice the line starts to curve. When
you get the curve you want, release the mouse button. |
|
|
| Now make another point. You’ll notice Illustrator makes a reciprocal curve. |
|
|
| Let’s say you aren’t happy with that curve. You can go to Edit >
Undo Pen to delete the last step. Or maybe you change your mind, go to
Edit > Redo Pen and it is back. |
|
|
| That curve still doesn’t look right to you, so let’s manually adjust
it. Go to Toolbar and select the Direct Selection tool (it’s the white
arrow). |
|
|
| You’ll notice that whenever you make a curved line it has a little
blue handle (or other layer color) that comes off of it. You can use
this to adjust the curve. Click and grab the point at the end of the
handle and move your mouse around to adjust the curve. Once you get the
curve right release the mouse button. |
|
|
After all that, you still hate your curved line, so let’s delete it.
Select the Selection tool, the black arrow on the Toolbar and click on
your curved line. Then hit Delete on the keyboard. It should be gone.
You can always Undo it if you want it back.
To make your life easier, I have a list of keyboard shortcuts for the Toolbar tools here. |
|
|
| Finally, let’s make a line that curves then goes straight. Make a curved line like you did before. |
|
|
Instead of making another point, click on the Direct Selection or the
Selection tool and deselect your line. To deselect your line, just
click on a blank spot on the artboard using one of the Selection tools.
A good trick to switching between the Pen tool and your last used
Selection tool is to hold down the Command (Apple) key on a Mac or the
Control key on a PC. Try it out. Select the Pen tool on the Toolbar. Now
hold down the Command/Control key. You’ll notice the tool tip change
from the Pen to the Selection tool. |
|
|
| Back to your curved line. To restart drawing on the same line, hover
your mouse over the end point like you did when you were closing a shape
or path. This time instead of a circle beside the Pen tool tip, you’ll
see a slash mark. This means you’re over the point. Click on it and then
make your next point and your line will continue. You should have a
line that curves then goes straight. |
|
|
Well, that’s it for my Pen tool basics. There’s more to the Pen tool,
but that’s enough to get you started. The next tutorial will be
applying all of this to the leaf sketch from the first tutorial in the beginner’s series.
Illustrator Beginner’s Series 3: Tracing with the Pen Tool
This
is the third part in my Adobe Illustrator Beginner’s series. This
tutorial is about tracing over your pencil sketches with the Pen tool.
The first part of this series was about getting your sketches into
Illustrator and the second part was about using the Pen tool. If you
missed the either part, you can check out the first one here and the second one here.
Here’s my placed sketch. |
|
|
Select the Pen Tool and the color you want to draw in from the
Toolbar. I like to draw in a bright color like red, so I can see the
lines over my sketch.
Start by clicking on the bottom of the leaf in the middle. Next,
click on the top in the middle. Hold down the Shift key when you click.
Holding down the Shift key will make your line straight. |
|
|
| Now, you want your line to curve to follow the shape of the leaf.
Make your next point, at the end of the curve, but don’t release the
mouse button. Instead, slowly move your mouse down. Notice it is making a
curved line. When you get the curve correct release the mouse button. |
|
|
| After making a curved line, you’ll want to click off your line to avoid the recipricol curve like in the last tutorial.
Hold down the Command/Control key to get either the Direct Select or
the Selection tool and click off the line on the empty artboard. Then,
release the Command/Control key and continue drawing with the Pen tool. |
|
|
| Now you want to continue drawing with your line. With the Pen tool
selected, hover your mouse over the end of the line. A small black slash
mark will appear next to pen tool tip (or the part where your pen meets
paper). This means that you are over the end point of the line. Click
on it. If you miss just undo. Go to Edit > Undo or Command/Control Z. |
|
|
| Next, click on the next point you want your line to continue to. This
line is a straight line, so you won’t have to click off of it to draw
the next one. |
|
|
| Continue following the contour of the leaf by making the line curve
and go straight. When you come to the end, you’ll want close the shape.
If you remember from the last lesson, to close a shape hover over the
first point you made. You’ll know you’re over the point when a small
circle appears next to your pen tool, then click on the point. Your line
or path is closed. |
|
|
| You have just drawn half the leaf shape. The next lesson will show
you how to flip the shape and join it, so you have a symmetrical object. |
|
|
Illustrator Beginner’s Series 4: Symmetrical Objects
This is the fourth tutroial in the Illustrator Beginner’s series. We’ve already covered placing sketches, using the Pen tool and tracing sketches with the Pen tool.
This lesson is about making symmetrical vector files. The best way to
make sure your file is symmetrical is to draw half of it and flip it.
In the last tutorial, I traced over my placed sketch with the Pen Tool. Since the stem isn’t symmetrical, I’ll draw that later. |
|
|
| Next, I want to use the Reflect Tool. It usually hides under the Rotate Tool, so click and hold the Rotate Tool to see it. |
|
|
| With your leaf half selected, double click on the Reflect Tool. A
dialogue box will pop up. Set the Axis to Vertical and click copy. |
|
|
| This will make a copy of your leaf facing the opposite way. |
|
|
| Next, you’ll want to make sure your Smart Guides are on. Go to View
> Smart Guides or use the keyboard shortcut Command/Control U. If
you’d like to know more about Smart Guides you can see a brief tutorial
about it here. |
|
|
| With your Smart Guides on, you can roll over your lines and they
light up and say things like path or anchor. Now, you’ll need to line up
the two edges of your leaf halves. Roll over straight edge of one of
your leaf halves. When it says path, click on the line and drag it
towards the other half’s straight edge. You’ll want to hold down Shift
while dragging the half. Holding down Shift constrains your object to
moving on only one axis. In this case, you want your object to move
right and left, but not up and down. When the leaf half line that you’re
dragging hits the other leaf half’s line, the line will light up and it
will say intersect. That means they are lined up and you can stop
dragging. |
|
|
| If for some reason your two halves aren’t top aligned, you can use
the Align palette to align them at the top. Open the Align palette by
going to Window > Align. |
|
|
| Now that your leaf halves are lined up, you’ll need to join them. |
|
|
You can use the Pathfinder palette to join them. If you don’t have
your pathfinder palette open, go to Window > Pathfinder. Select both
halves using the Selection tool in the Toolbar. To select a second
object, hold down Shift and click on the second object.
With the two halves selected, use the Add to shape area on the
palette. It is the first button on the top row. Click Expand to finish
joining the objects. Now, you have a symmetrical object.
As with any time your working in Illustrator, if you make a mistake use the Undo. Go to Edit > Undo or Command/Control Z. |
|
|
| Since your leaf shape is complete, we’ll move onto the eyes in the next tutorial. |
|
|
|
|
Illustrator Beginner’s Series 5: Using the Ellipse Tool
| This is the fifth tutorial in the Illustrator Beginner’s series. We’ve already covered placing sketches, using the Pen tool, tracing sketches with the Pen tool and making symmetrical vector files. This lesson covers using the Ellipse tool to make eyes.
Here’s my sketch. You can either work on the same layer as the leaf
shape or create a new one to work on for the eyes. If you want a
refresher on using layers, you can refer to the first tutorial. |
|
|
| Select the Ellipse tool from the Toolbar. |
|
|
| Next, draw an ellipse. Click on the starting point of your oval and
slowly pull your mouse down until your ellipse is about the same size
and shape as your sketch. |
|
|
| Many times, I’ll just use the oval as is, but let’s make it a little
more difficult by using the Direct Selection tool to adjust the curves.
You may want to zoom in on your oval to adjust it. Z on your keyboard
will bring up the Zoom tool. If you click on the artboard with the Zoom
tool, it will zoom in a set amount. This is kind of tedious, so I
usually use it by clicking and dragging a box around the area I want to
zoom in on. I think this is a much easier way to use it. To zoom out,
hold down the Option/Alt key. You’ll notice the tooltip changes from
zoom + to zoom -. Again, this will only zoom you out in increments. I
like to use View > Fit in Window or Command/Control 0.
Alright, back to the Direct Select tool… I click on the line of the
oval with the Direct Selection tool. The line lights up and I can see
all the anchor points and handles. I start by clicking on the left
middle anchor point and pulling it down a little. This makes my eyeball a
little more bottom heavy and egg shaped. Next I grab the top left
handle of the top anchor point and move it in or closer toward the
anchor. If I hold down Shift while I’m moving it, it will only move in
one direction. Then, I do the same with the right handle. |
|
|
| For a more precise way to move anchor points and handles, you can
use the arrow keys on your keyboard. Select the anchor point or handle
you want to move and click on the arrow key to move it in an incremental
step.
You can adjust the distance the point moves by changing your
settings. Go to File > Preferences > General. A dialogue box pops
up and the first box is keyboard increments. |
|
|
| Next, draw the pupil with the Ellipse tool. Holding down the Shift key while you draw an oval will make it a perfect circle. |
|
|
| Now to flip the eye you just drew, so you can have a symmetrical
second eye. Select both the eyeball and the pupil with the Selection
tool. Next drag them to the right like you were going to move them, but
hold down the Option/Alt key and the Shift key. You’ll want to press the
Shift key after you start dragging, otherwise you’ll deselect the
shapes. Holding down the Option key will make a copy of the shapes while
you drag them and holding down the Shift key will make sure that you
only move the shapes left and right and not up and down. |
|
|
| To flip them, double click on the Reflect tool while they are selected. |
|
|
| A dialogue box pops up. Choose Vertical and click OK. |
|
|
| You’ll probably have to move the eye a little after it flips to get
it in position. Hold down the Shift key when you move them like before,
so the eye only moves in one direction. Or you can use the arrow keys to
nudge it over. Here are the eyes with the leaf shape. Next, it is on to
the mouth and the stem. |

Illustrator Beginner’s Series 6: Creating Symmetrical Curves
This is the sixth tutorial in the Illustrator Beginner’s series. We’ve already covered placing sketches, using the Pen tool, tracing sketches with the Pen tool, making symmetrical vector files and using the Ellipse tool. This lesson covers creating symmetrical curves by making the smiling mouth.
Here’s my sketch. You can either work on the same layer as your other
shapes or create a new one to work on for the mouth. If you want a
refresher on using layers, you can refer to the first tutorial. |
|
|
Start by drawing one half of the smile using the Pen tool. Start your
first point at the corner of the mouth and make the second one near the
middle of the mouth. Hold down the Shift key while making the line
curve. If you need a refresher on the Pen tool, check it out here.
The reason for holding down the Shift key is it makes your curved
line end pointing in a straight line or parallel to your page edge
(instead of being angled up or down). |
|
|
Next, draw the crescent shape for the cheek. Start by making the top
curved line with the Pen tool, then click off of the line. Remember you
can hold down the Command/Control key to quickly switch between the Pen
and the Selection tools. Now, start drawing again by hovering your mouse
over the last point you made. When you see the slash next to the
tooltip, click on the point. Then complete the shape by hovering over
the original point until you see the circle. Click on the point and pull
out your curve.
Note: If you try to restart your curve on the first point you made,
you’ll probably have trouble with trying to make the right shape (you
end up with a distorted blob). If this happens to you, undo the last
line (Command/Control Z) and start at the opposite point instead. |
|
|
| Now, select the two parts of the mouth to make a copy. To select
multiple objects, Shift click on the second object or draw a box around
all the objects you want to select with the Selection tool. Now that
your objects are selected, hold down the Option and Shift keys while
dragging the objects to the right. You’ll want to press the Shift key
after you start dragging, otherwise you’ll deselect the shapes. |
|
|
| With your copied half mouth selected, double click on the Reflect tool. |
|
|
| A dialogue box pops up. Select Vertical and click OK. |
|
|
| Your mouth should have flipped. You may need to move it around to get it to line up with your sketch. |
|
|
| Now connect the two mouth halves with the Pen Tool. |
|
|
| Open up your Stroke palette. Go to Window > Stroke. |
|
|
| The Stroke palette pops up and I set my stroke to 2 pt. This will thicken up your line a little. |
|
|
| Now, let’s make your line into a closed shape. Select just the mouth
and not the cheeks. Go to Object > Path > Outline Stroke. You’ll
notice your stroked line is now a closed shape. I usually don’t do this
step until the very end, so I can change the stroke weight if I want. |
|
|
| You can also outline your stroke by using the Flatten Transparency.
Flatten Transparency will also convert dashed lines and brush effects
which the Outline Stroke doesn’t do. Go to Object > Flatten
Transparency to use it. Move the slider to 100% Vector. |
|
|
| Finally, select the cheeks and the smile and use the Add to shape
area from the Pathfinder palette. Again, I probably wouldn’t do this
step until the end. Just in case I wanted to change something, but I
figured it was good to show for the tutorial. |
|
|
| Here’s my final mouth. I was originally going to do the stem in this
tutorial too, but this one ran long. So, it will get done in the next
one. |
|
|
Illustrator Beginner’s Series 7: Turning Lines Into Shapes
This is the seventh tutorial in the Illustrator Beginner’s series. We’ve already covered placing sketches, using the Pen tool, tracing sketches with the Pen tool, making symmetrical vector files, using the Ellipse tool and creating symmetrical curves. This lesson covers turning lines into shapes.
Here’s my sketch. You can either work on the same layer as your other
shapes or create a new one to work on for the stem. If you want a
refresher on using layers, you can refer to the first tutorial. |
|
|
| I start by drawing a curved line. If you need a refresher on the Pen tool, check it out here. |
|
|
| Next, I open my Stroke palette. Go to Window > Stroke. |
|
|
| The palette pops up. I click on the up arrow next to the stroke
weight. This increases my stroke weight by one at a time. I do this
until it looks about the right width as my sketch. I ended up with a 10
pt line. |
|
|
| Next, I want to turn my line into a shape. I’m going to use the
Outline Stroke. Go to Object > Path > Outline Stroke. You can also
use the Flatten Transparency. |
|
|
| Your line turns into a shape. It will now have a solid fill instead
of a stroke. If you want to change the color back you can either change
your colors the usual way or you can use the Eyedropper tool. To use the
Eyedropper, select the stem, change to the Eyedropper tool and click on
another object with it. I turned the layer with the eyes back to
visible in my layer palette and clicked on the eyes with the Eyedropper.
The Eyedropper changes the stem to the same color as the eyes. It also
picks up the same stroke weight. |
|
|
| Here’s what my leaf stem shape looks like. |
|
|
| Next, I use the Direct Selection tool to adjust the shape. I pull out
the bottom anchor points a little and the move the top ones in a little
bit. |
|
|
| I want my stem to have a slight curve to the bottom, so I’m going to
add an anchor point to the bottom. You can either add anchor points with
the regular Pen tool or the Add Anchor point tool (located in the same
spot as the Pen tool). To add an anchor point, select the stem shape.
Then, switch to the Pen tool and click on the spot on the line where you
want to add another point. I put one in between the bottom two points. |
|
|
| Next, I use the Direct Selection tool to move my new anchor point down. |
|
|
| Now, I want to make the new point curved. To do that, I’ll need to select the Convert Anchor Point tool. |
|
|
| Click and drag on the new anchor point with the Convert Anchor Point
tool. Instead of moving the point, you’ll notice it creates handles and
the line curves. Move it around until you get the desired curve. You can
also go in and fine tune the shape with the Direct Selection tool. |
|
|
| Well, that’s it. You’ve finished tracing the sketch. I went back and
turned on all the layers and turned off my sketch layer. I may or may
not continue with this series, so hopefully, this helped prepare you for
some of the other cartoon tutorials. Let me know if anything isn’t clear or you’d like further explanation of something. |
|
|
Illustrator Beginner’s Series 8: Using Offset Paths for Dynamic Lines
This is the eighth tutorial in the Illustrator Beginner’s series. Up
to this point, you have mostly been learning to trace over sketches with
the Pen Tool. If you missed any of those thrilling tutorials, you can
check them out here. With this tutorial, you’ll learn how to create dynamic lines with the Offset Paths feature.
Here is my stroked line drawing from the last tutorial. |
|
|
| I start by selecting the pupils in the eyes and the mouth using the
Selection Tool. To select multiple objects, press the Shift key each
time you click. |
|
|
| Next, change the color of the stroke to none and the color of the fill to black using the Swatch palette. |
|
|
| You can also use menu bar at the top to change colors. They added
this menu in either CS or CS2, so you may be out of luck if you’re on an
older version of Illustrator. |
|
|
| Your drawing should look like this after the color change. |
|
|
| Next, select the leaf part. |
|
|
| I’m going to change the color of this to white. The final won’t be
white, but I usually like to fill everything with either black or white
to start. Don’t ask me why. That is just the way I do things. Anyway…
instead of using the Swatch palette to change the color, I’m going to
use the Eyedropper tool. With your leaf selected, click on any of the
white space of your artboard. The leaf will turn to white. |
|
|
| Now, you’re ready to use the Offset Path on the leaf. Go to Object > Path > Offset Path. |
|
|
| A dialogue box pops up and I set the Offset to 2 point. |
|
|
| This creates a shape that is uniformly 2 points larger than the
original. I set the color to black for the new shape. Notice how it
looks like a line, even though it is just a slightly larger shape. |
|
|
| If your leaf is overlapping your eyes or your stem is overlapping
your leaf shape, you may need to move things around. If you are working
on layers, then drag the layers into the right order. Be careful not to
drag the layers into one another. You can always undo layer changes with
the Undo (Command/Control Z). |
|
|
| If you aren’t using layers, then use the Send to Back (Object >
Arrange > Send to Back). I have a little trick to move things around
using the Send to Back and the Group. Basically, if you group an object
in the back to one in the front, the group moves your object in the back
to directly underneath the front object. This also works for layers. If
you group two objects from different layers, it will move the object
from the lower layer onto the upper layer. This trick mixed with the
keyboard shortcuts (Command/Control G and Shift Command/Control [ ) can
save you a lot of time. |
|
|
| Next, I repeat the steps I did with the leaf shape on the stem. |
|
|
| After that, I do the same thing with the eyes. For the eyes, I used a 1 point offset. |
|
|
| Finally, I wanted to make my lines a little less uniform looking. I
start by selecting the eyes with the Selection Tool. When the eyes are
selected, you can see a bounding box around them. Pull down on the
middle anchor point on the bounding box. This will make the black shape a
little larger which make the line weight look heavier on the bottom. |
|
|
| I also adjusted the leaf shape as well. Here is what the whole thing
looked like when I finished. Hey, you’ve got a line drawing! Put some
color on that sucker and your Grandma just might hang it on her fridge.
With that said, next up is the magical world of color. |
|
|
Thanks to all.
Join here:
Facebook Fan page : https://www.facebook.com/tipsforgraphics
Facebook Group: https://www.facebook.com/groups/tipsforgraphics
Some useful links for Adobe Illustator:

This in-depth 30 day course from Vector Diary is one of the most useful courses out there. What’s more, it’s free!
IllustrationInfo’s Illustrator beginner’s series covers the most common tools with insights into their uses.
The collection of tutorials and guides from klethegr8 include various hints and tips for all kinds of tools.
Posts
filed under the Illustrator tag on ShapeShed include some great
introductions to most of the important tools and techniques, including
blends, rounded edges and the pathfinder.
The
newly added Blob Brush to Illustrator CS4 opens up doors to new
opportunities. Layers Magazine explain more with this useful video
tutorial.
Another
new feature in CS4 was a bunch of new gradient editing capabilities.
Here’s an overview of some of the new ways to create and tweak gradient
fills in Illustrator.

Brushes
are an important tool in Illustrator, and come in various styles. This
tutorial from Bittbox covers the Art brush, with great examples of how
it can be used.

Opacity
masks are one Illustrator feature that can really come in useful,
particularly for those with versions prior to CS4 who don’t have access
to the new gradient opacity options.

The
basic pattern in Adobe Illustrator isn’t anything to get excited about,
but when combined with other Illustrator tools, it can result in some
amazing effects.
Unsurprisingly,
Adobe Illustrator really shines when used for creating illustrations,
and no illustrator is complete without a Wacom tablet. Here’s some handy
tips for fine tuning your settings.

Illustrator’s
fills and strokes often cause confusion to designers moving from
Photoshop. This selection of tips and shortcuts from Vectips gives a
clear understanding of how to quickly set them up.

The
Pen tool is the most important tool to master in Adobe Illustrator, and
can unfortunately take quite a lot of practicing to master. Arm
yourself with this great insight and knowledge of how it works.
The
Pathfinder is also a crucial weapon to master in Illustrator. It’s used
in almost every Illustrator project you’ll work on, so it’s quite
useful to learn how it works.

Gradient
Mesh is actually one tool I still need to wrap my head around, but once
mastered it can seriously take your Illustrations to the next level
with the ability to create photo-realistic artwork.

The
blend tool is one of Illustrator’s most powerful features. This
in-depth post focuses entirely on its use, with a large selection of
examples and diagrams.

The
Type Tool might not sound like it needs much introduction, but
Illustrator also provides some extraordinary type related options.
Here’s a handy overview.

While
the Art brush was covered in a previous tutorial, here’s a general
overview of all four types of brushes in Illustrator, with detailed
explanation of how to use each one.
Just
like masks in Photoshop, Illustrator uses masks to hide and show
various parts of the artwork. Here’s an overview of Clipping and Opacity
masks, and how they can be used in a real-world project.
These
shortcuts aren’t just the keyboard alternatives to popular menu
commands, they also open up new options that otherwise aren’t available.

If
hands-on learning is more your thing, why not try this RSS icon
tutorial? It covers many of the basic commands, plus touches on some
advanced tools such as the Pathfinder and creating offset paths.
|


No comments:
Post a Comment