

Learn in this tutorial how to create interesting and modern wallpaper.
Start working by creating a new file (File>New) with 1280×1024 px and 300 dpi.
Next we’ll select the Rectangle Tool (U) to create the background of the picture we want finally to get.

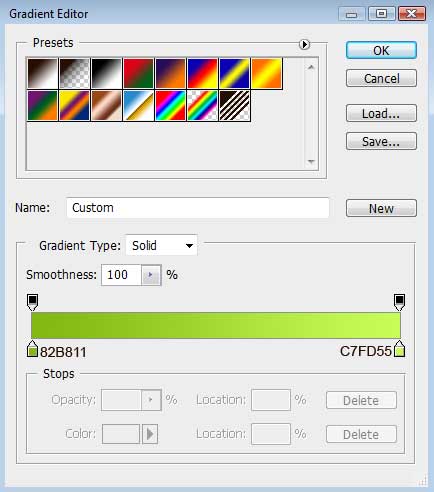
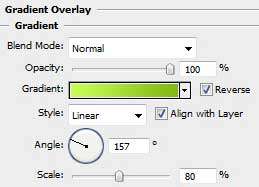
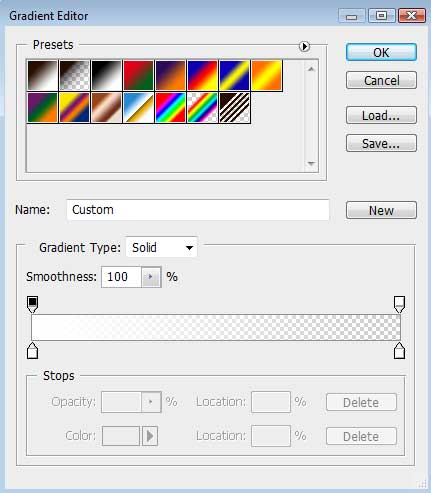
Apply the next demonstrated parameters by making a mouse click on the processed layer on the layers’ palette. Blending Options>Gradient Overlay

Gradient’s parameters:


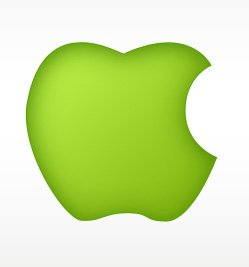
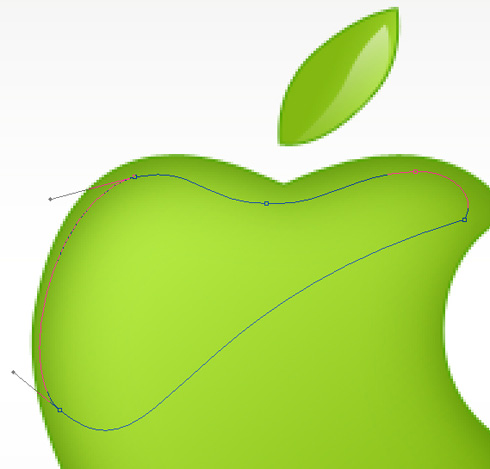
Select now the Ellipse Tool (U) to draw the silhouette of an apple (the logotype of the Apple Computer Company). Using the Add Anchior Point Tool, we may insert several tops on the made circle and then the Convert Point Tool may help us to move the made elements to the central part of the apple. Press Alt button while using the Ellipse Tool (U) to cut out a part of the apple, from its right side, the same way shown below:

The layer’s parameters: Fill 0%
Blending Options>Inner Shadow

Blending Options>Inner Glow

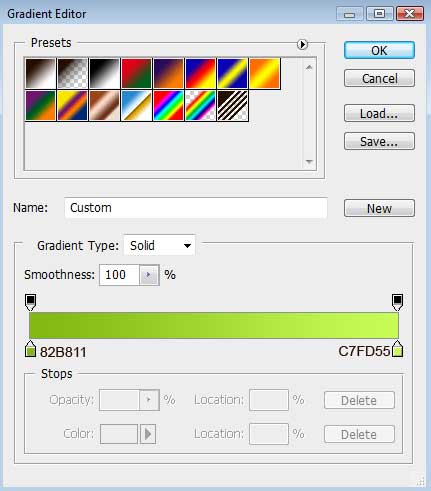
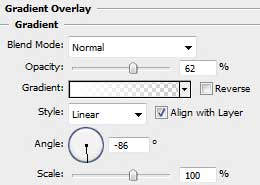
Blending Options>Gradient Overlay

Gradient’s parameters:
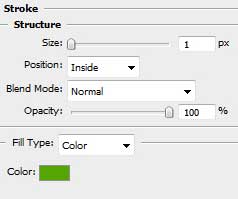
Blending Options>Stroke

Choose next step the Pen Tool (P) to draw a leaf on the apple’s top, which shape may be changed with the Convert Point Tool.
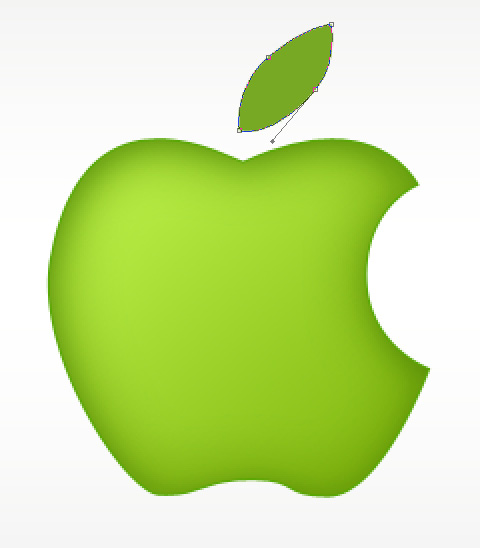
The layer’s parameters: Blending Options>Gradient Overlay
Gradient’s parameters:
Blending Options>Stroke

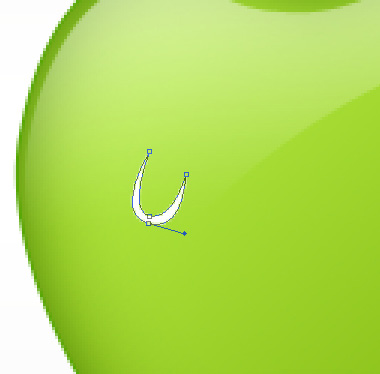
The Pen Tool (P) should be used for drawing a highlight on the made leaf, but the Convert Point Tool may be helpful in making the appropriate corrections on the highlight’s shape.

The layer’s parameters: Fill 0%
Blending Options>Gradient Overlay
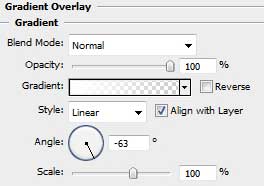
Gradient’s parameters:

The same instrument used before – the Pen Tool (P) will be used for picturing another highlight, this time on the apple itself. Here the Convert Point Tool should be used too, for the appropriate shape’s changes on the highlight.
The layer’s parameters: Fill 0%
Blending Options>Gradient Overlay
Gradient’s parameters:


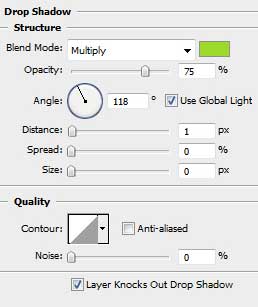
Insert on our apple a drop of white color, applying the same Pen Tool (P) and the already known Convert Point Tool.
The layer’s parameters: Blending Options>Drop Shadow
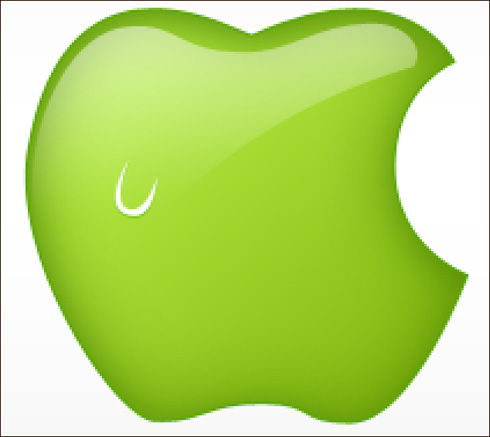
The Ellipse Tool (U) should be used for representing a highlight on the drop, which color is white.


Create a new layer and use on it the Brush Tool (B) (Opacity of 20%) to draw one more highlight on the apple, which color is white too.

Combine in a group all the layers composing the apple (press Ctrl button to mark out the corresponding layers and hold on the left mouse’s button while taking down the marked layers on Create a new group selection). Make a copy of the recently made group and choose the Free Transform solution to turn over the copy and place it the same way as it is represented below:
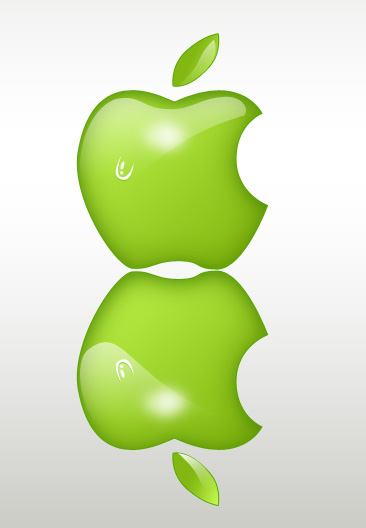
The Eraser Tool (E) should be applied on the made reflection (Opacity of 30%) to erase the same part on the reflection as it is indicated next image:

Create a new layer and use on it the earlier indicated standard brush of black color (Opacity of 20%) for drawing the shadow under the apple. This last layer should be placed under the layers, composing the apple, but upper than the reflection’s layer (on the layers’ palette).

Make a copy of the earlier made shadow’s layer and use the Free Transform option to place the copy lower, applying for the copy the next demonstrated layer’s parameters: Fill 72%
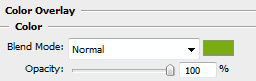
Blending Options>Color Overlay

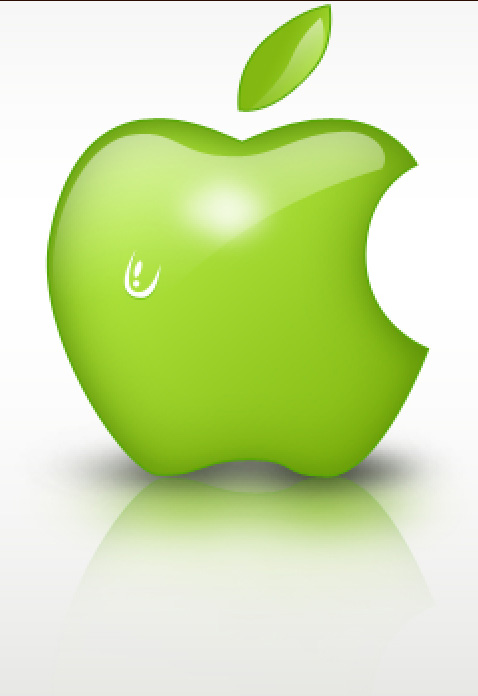
The apple is finished!
No comments:
Post a Comment