Final Image
Below is what the illustration will look like when we are done.
Step 1
First, create an ellipse with the Ellipse tool (L). Next, with the Direct Selection tool (A), select the bottom anchor point of the ellipse and drag it up about one fourth the way up the ellipse.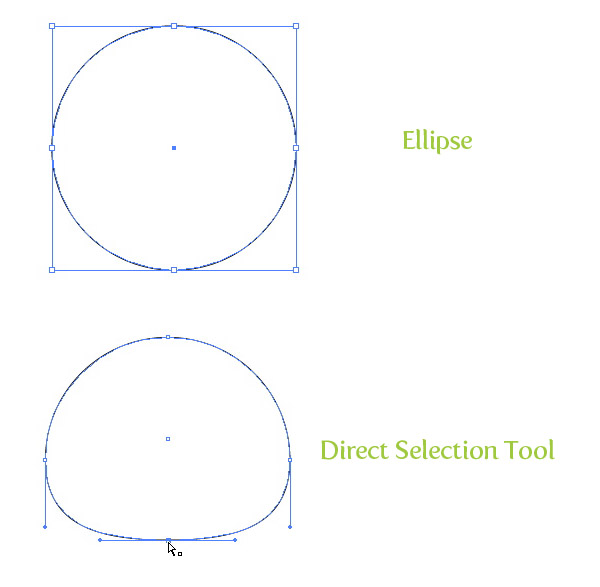
Step 2
With the ellipse selected, create a radial gradient from the gradient panel. Make the first Color Stop in the radial gradient white and the second Color Stop a light grey. Within the gradient panel, click on the Midpoint Indicator on the Gradient Slider and move it right, closer to the light gray swatch, making the white area of the gradient bigger.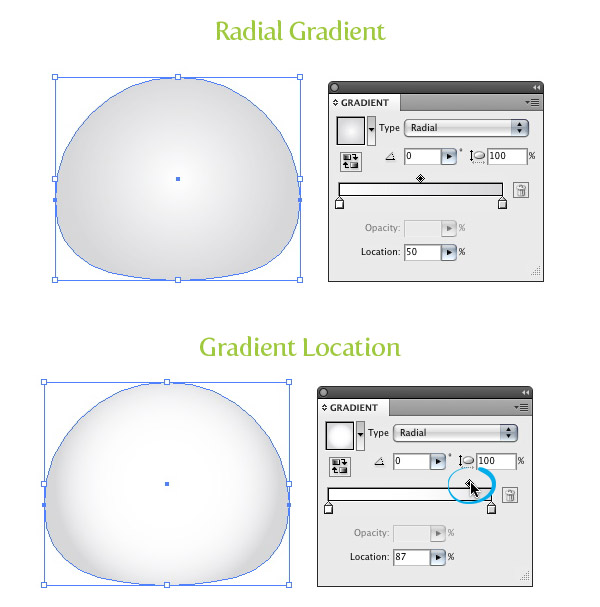
Step 3
Copy (Command + C) the ellipse and Paste in Front (Command + F). Next, scale down the copied ellipse to a third of it’s original size with the Selection tool (V). Still using the Selection tool (V), move the copy up to the top left side of the original ellipse and rotate the copy about 20 degrees to the left. This will be the first ear shape.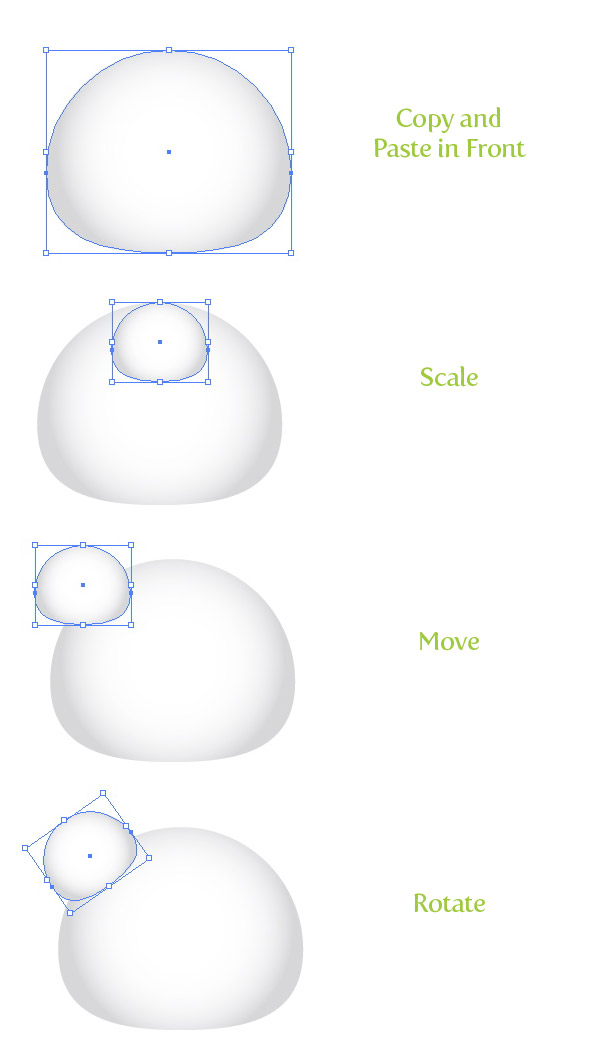
Step 4
Select the ear shape and change the gradient to a Linear Gradient from the Gradient panel. Change the first Color Stop to black and the second Color Stop to a dark grey color. Move the Midpoint Indicator on the Gradient Slider to mid-point of the two swatches. Next, send the copied ellipse to the back by choosing Object > Arrange > Send to Back (Command + Shift + [ ).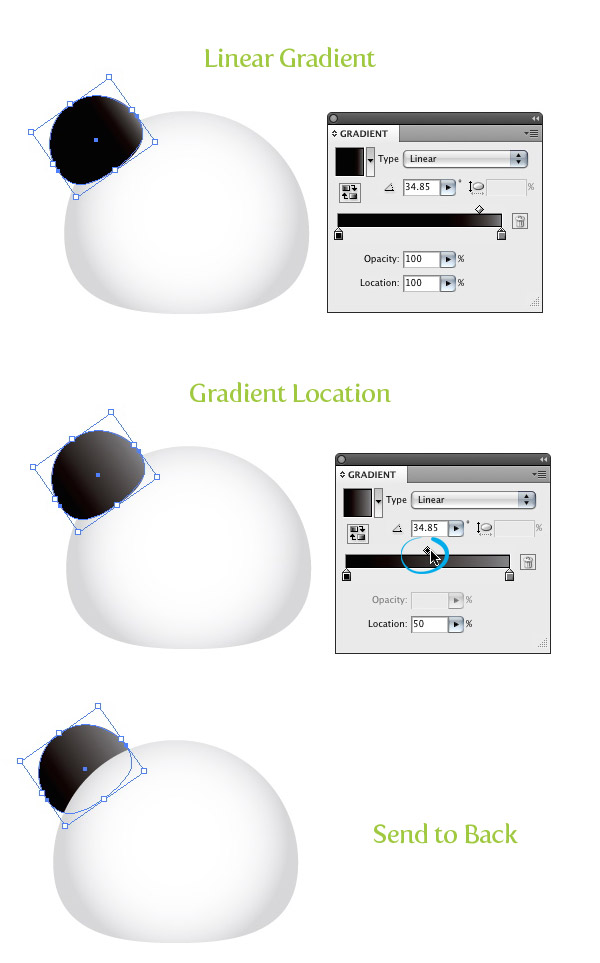
Step 5
Select the ear shape, Copy (Command + C), and Paste in Front (Command + F). With the Selection tool (V) scale the copy down slightly, squish it horizontally, and place to the lower left side of the first ear shape. Next, press the Reverse Gradient icon in the Gradient panel.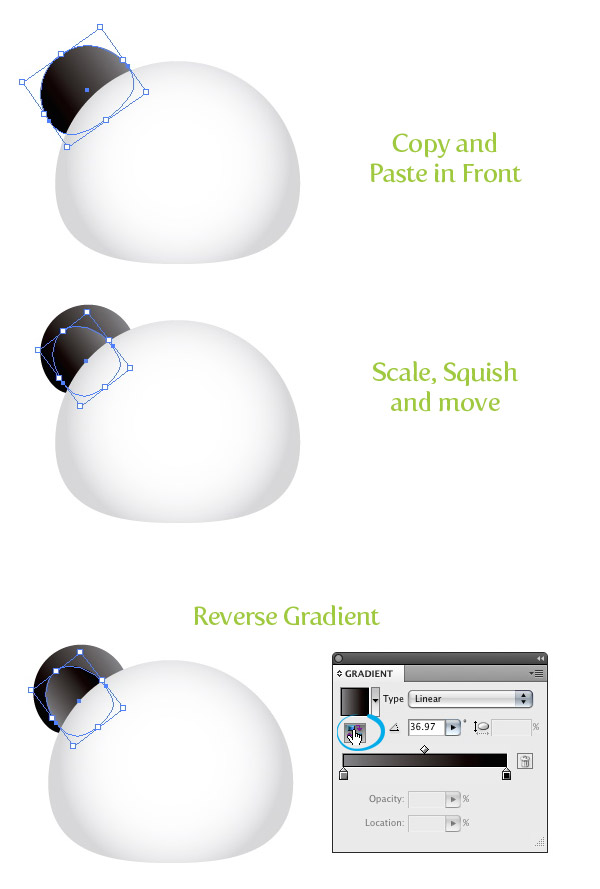
Step 6
Select both ear shapes, Copy (Command + C), and Paste in Front (Command + F). With the copies still selected, go Object > Transform > Reflect and chose Vertical from the Reflect dialog. Next, move the copied ear shapes over to the right side of the face shape.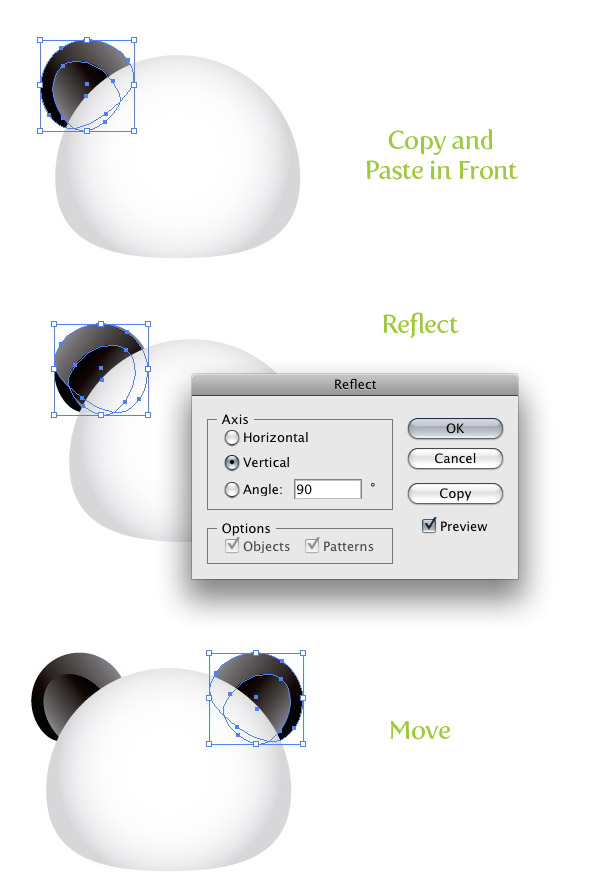
Step 7
Create an ellipse over the panda face where you want the eyes to go. Fill the ellipse with the same linear gradient as the first ear shape. With the Gradient tool (G), click on the top of the ellipse and drag down, making the darker part of the gradient appear at the top of the ellipse.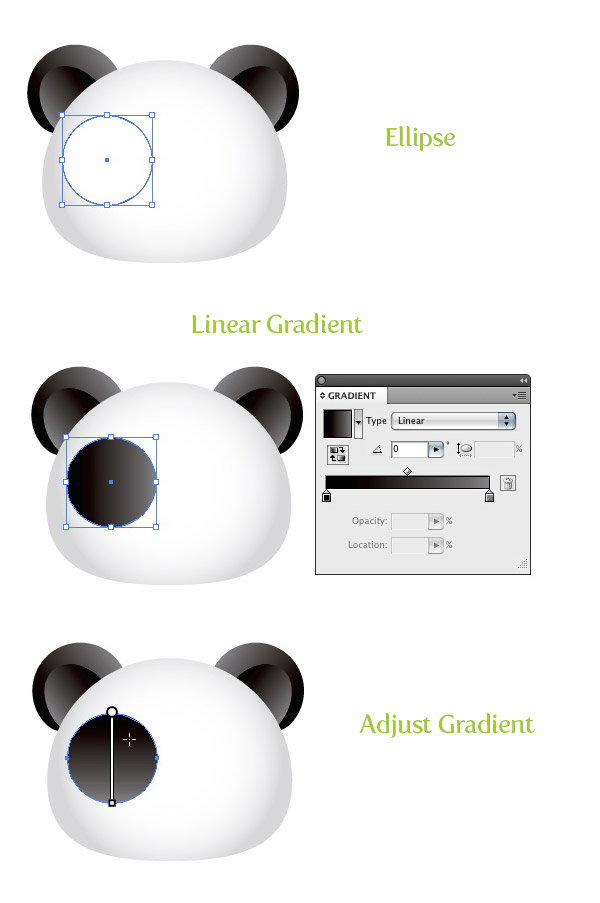
Step 8
Use the Direct Selection tool (A) and move the bottom anchor point down and slightly to the left. Next move the the top anchor point slightly to the left.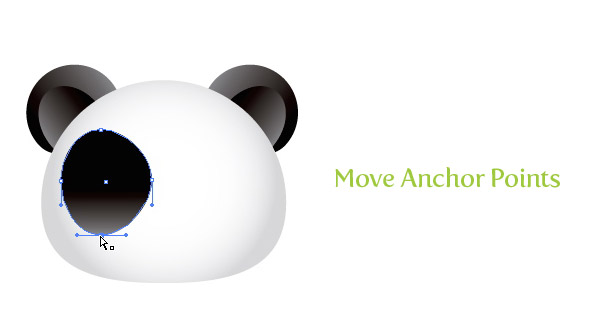
Step 9
Within the first eye shape, draw another ellipse and fill it with a linear gradient. For this gradient we are going to need three Color Stops in the gradient. To add a Color Stop to the gradient slider, simply click right below the gradient slider in-between the first two swatches. Change the first Color Stop to a dark grey, the second Color Stop to black, and the third Color Stop to a grey color. Use the Gradient tool (G) and adjust the gradient by click at the top of the shape and dragging to the bottom.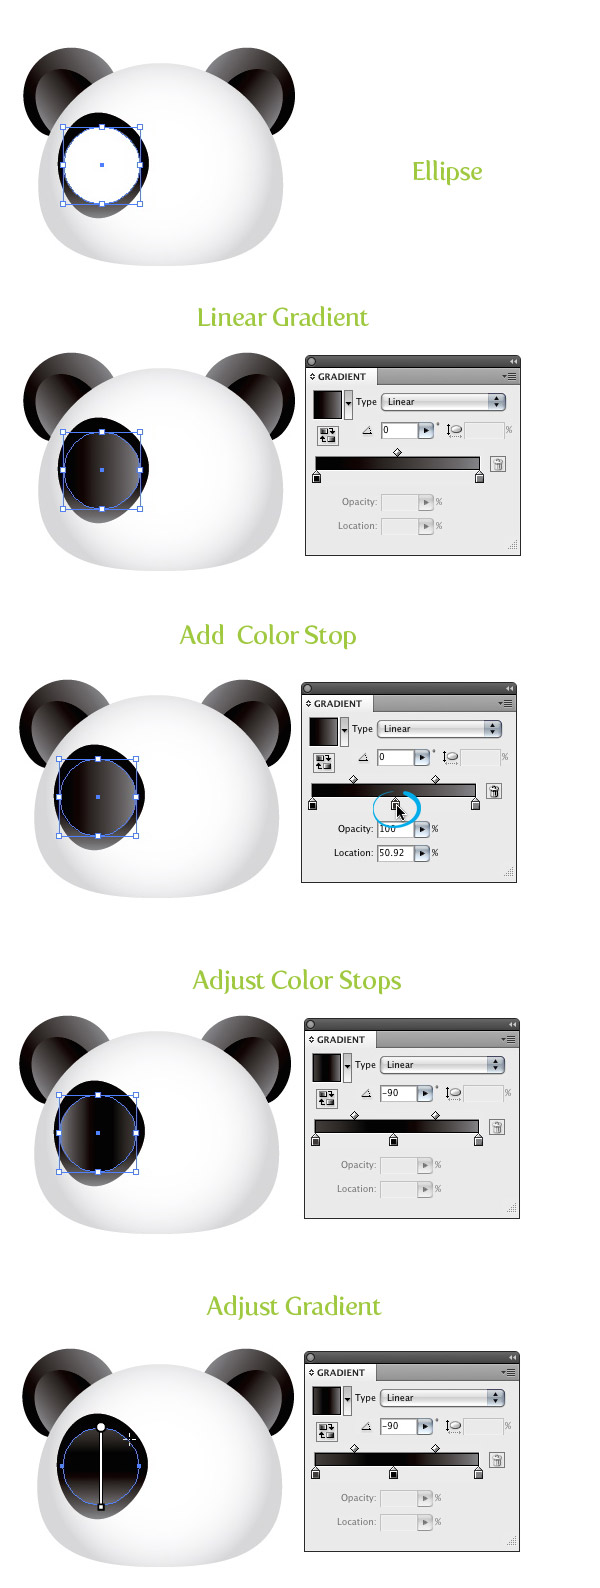
Step 10
Copy (Command + C) the newest ellipse and Paste in Front (Command + F). With the Selection tool (V) scale the ellipse down slightly so you can still see the three Color Stop gradient ellipse behind it. Next, use the Eyedropper tool (I) and sample the original white radial gradient from the panda face.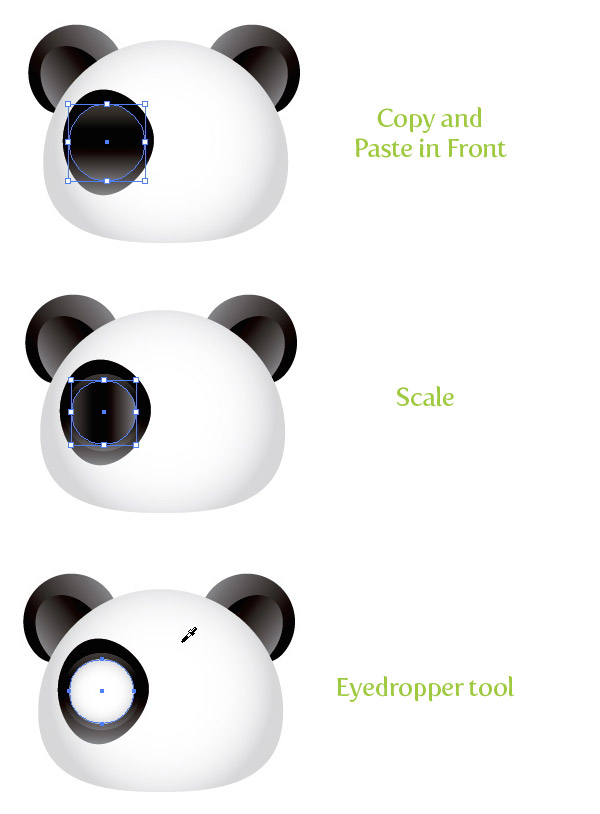
Step 11
Copy (Command + C) the white eye ellipse and Paste in Front (Command + F). Scale the it down and move it the right slightly. Next, change the first Color Stop in the gradient to a dark cyan color and the second Color Stop to a cyan color.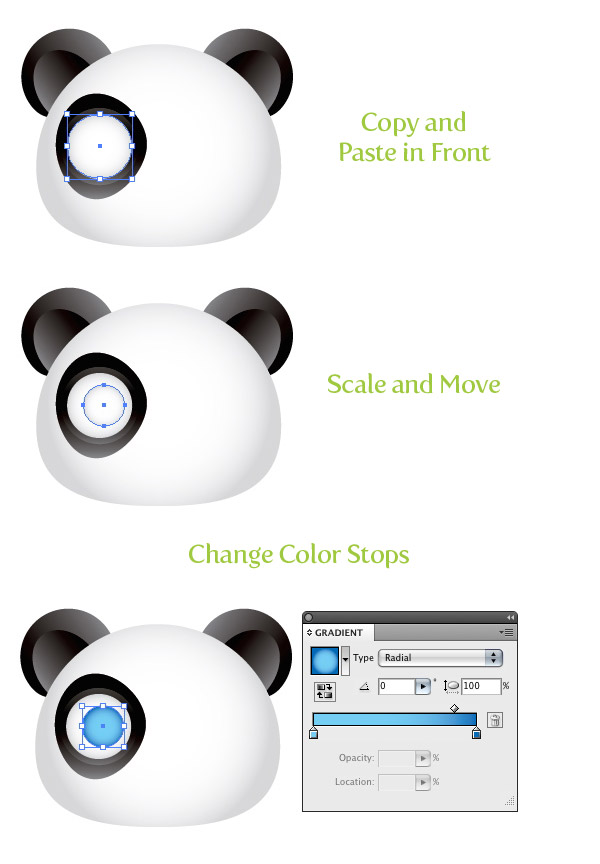
Step 12
Copy (Command + C) the cyan ellipse and Paste in Front (Command + F). Scale it down and change the first Color Stop to black and the second Color Stop to a dark grey color.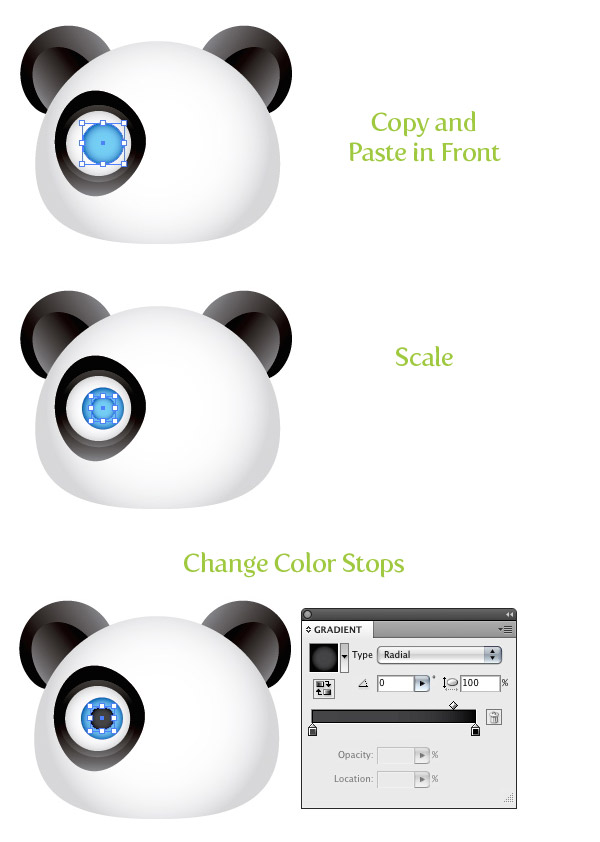
Step 13
Draw three white ellipses over the eyes shapes to create some highlights.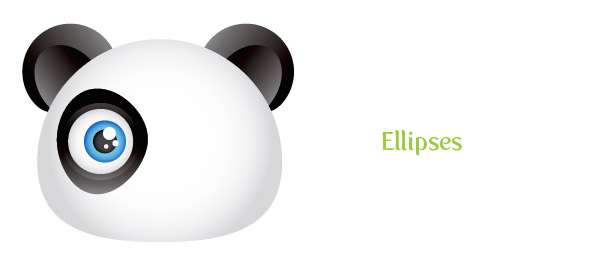
Step 14
Copy (Command + C) all the eye shapes and Paste in Front (Command + F). Next, go Object > Transform > Reflect, select the Vertical radial button, and press OK. Move the copied shapes to the right.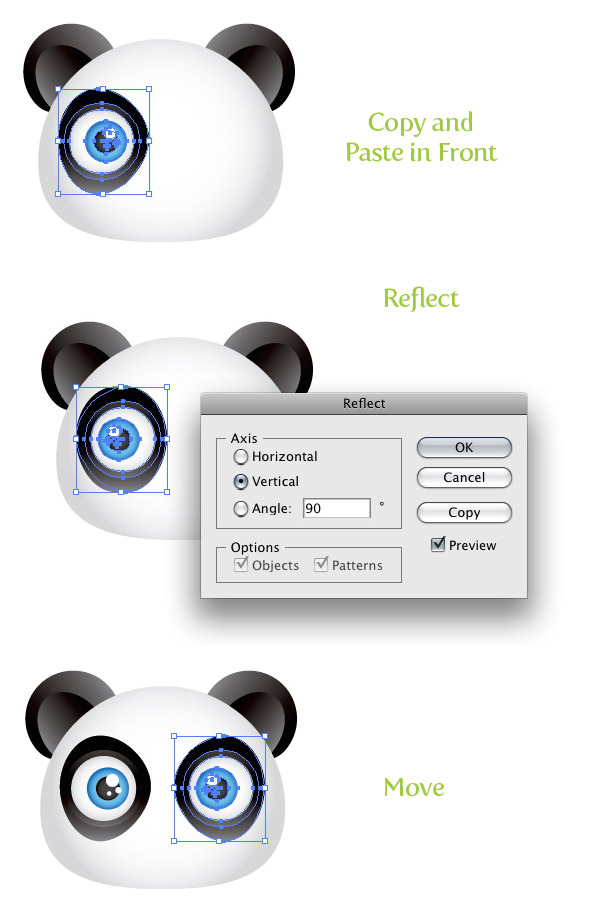
Step 15
Draw an oblong ellipse in-between and towards the bottom of the eyes. Use the Eyedropper tool (I) and sample the gradient of the inner ear shape.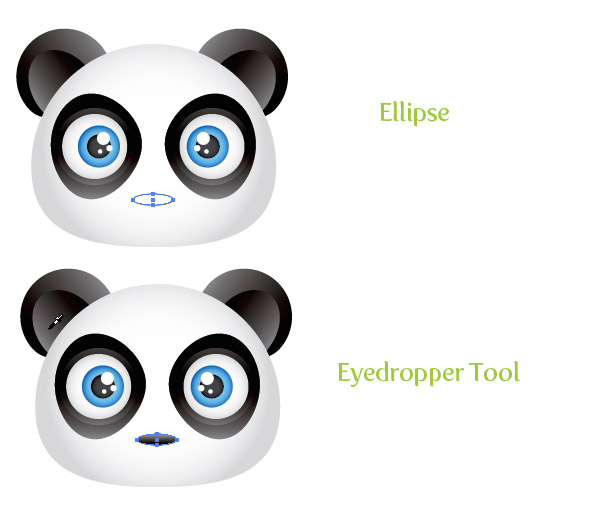
Step 16
With the new nose ellipse selected, go Effect > Warp > Arc. In the Warp dialog change the Bend to -40% and press OK.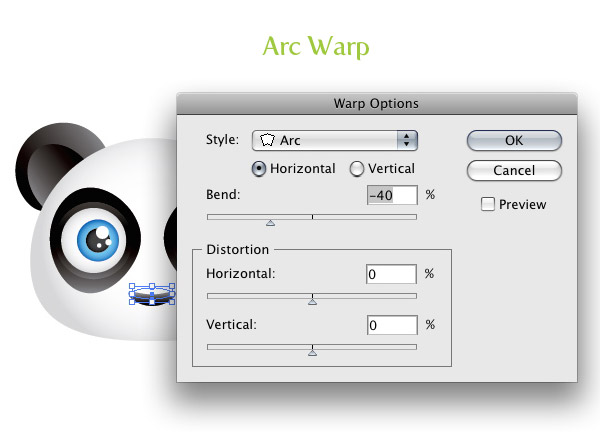
Step 17
Copy (Command + C) the main white panda shape and Paste in Front (Command + F). Squish the copied shape horizontally to the width of the nose shape. Next squish the copy vertically. Change the gradient of the copy to a linear gradient and make the last Color Stop on the slider and darker grey. Next, adjust the gradient so the lighter part of the gradient is at the top of the shape.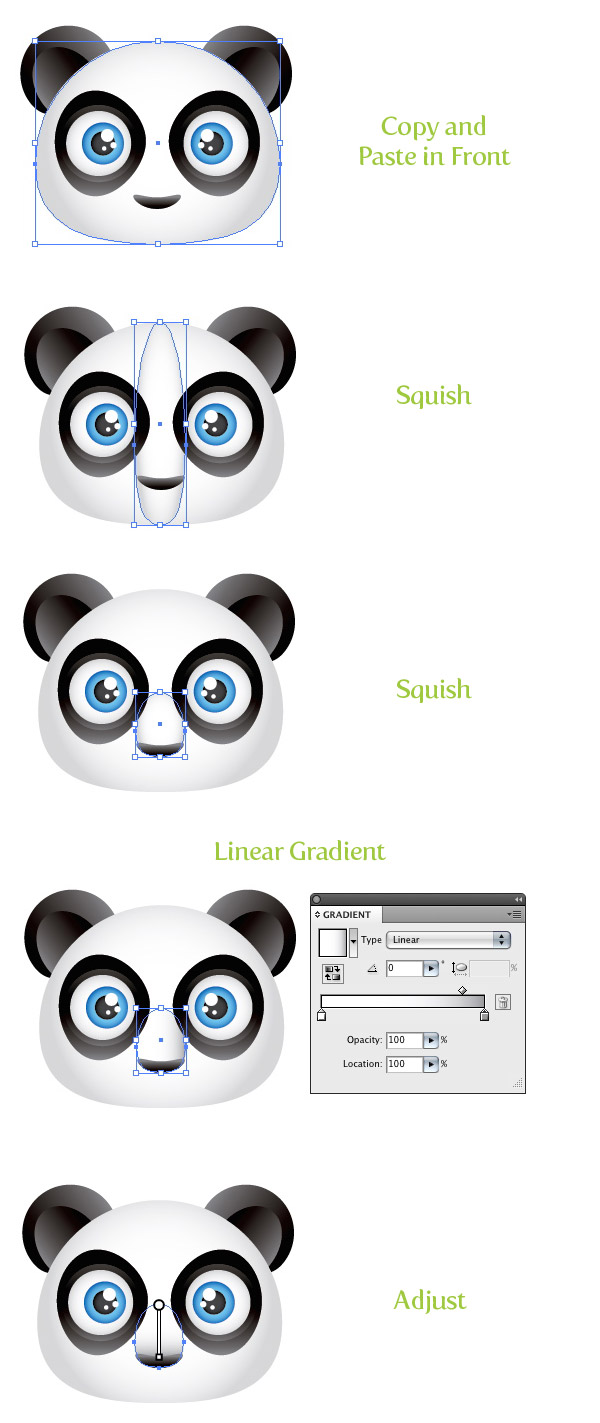
Step 18
Draw an ellipse with the right anchor point roughly in the middle of the nose shape. Copy (Command + C) the ellipse and Paste in Front(Command + F). Move the copy up and to the left slightly. Select both ellipses and press the Minus Front button in the Pathfinder panel and change the color of the shape to a grey color.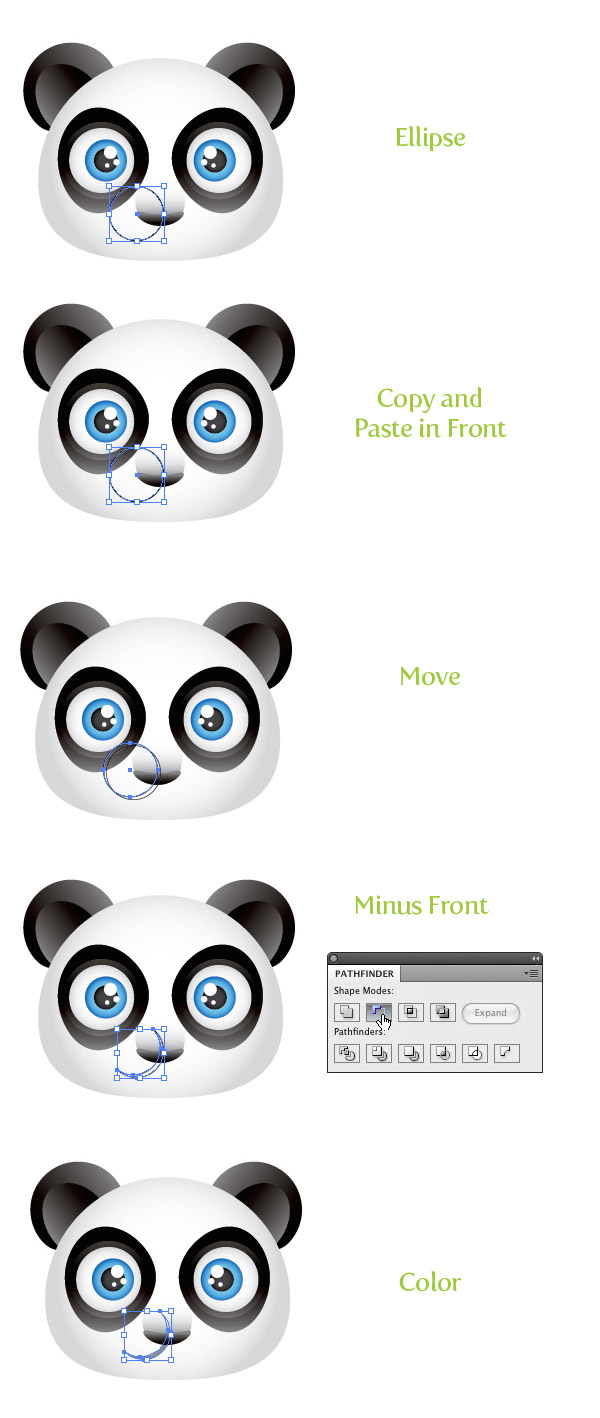
Step 19
Select the mouth shape and go Object > Arrange > Send Backward (Command + [). Do this a couple of times until the mouth shape is behind both nose shapes. Next, Copy (Command + C) the mouth shape and Paste in Front (Command + F). With the mouth shape selected, go Object > Transform > Reflect, select the Vertical radial button, and press OK. Move the copied shape to the right, creating the other side of the mouth.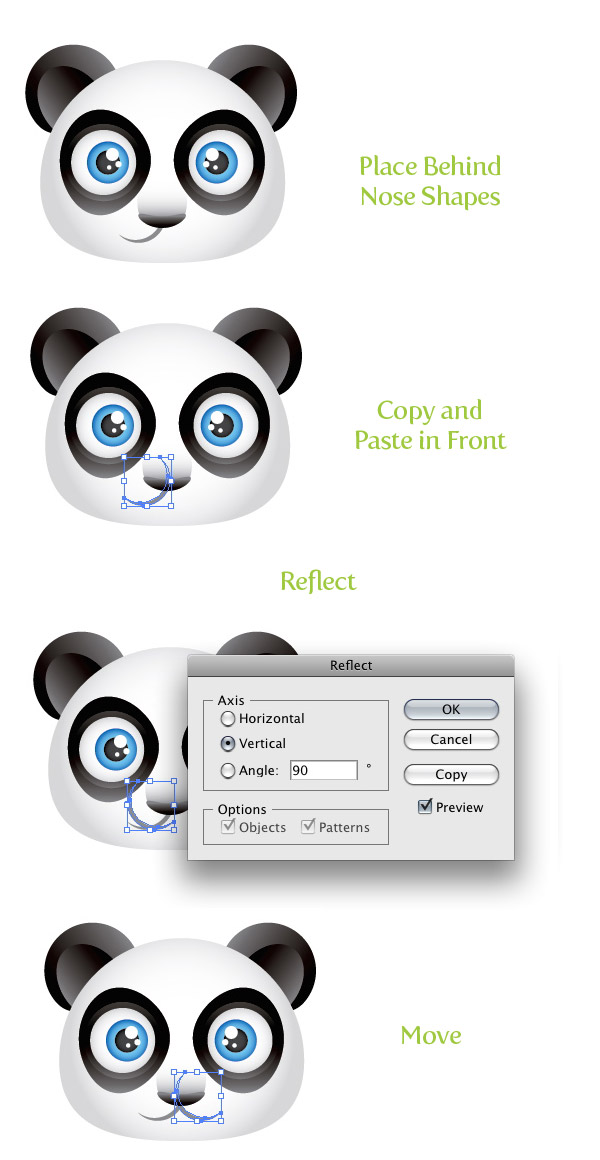
Step 20
Create an ellipse close to the end of the left mouth shape. Fill the ellipse with a radial gradient, with the first Color Stop a light pink color and the second Color Stop white. Next, set the Blending Mode to Multiply from the Transparency panel. Copy (Command + C) the pink ellipse, Paste in Front (Command + F), and move to the other side of the mouth.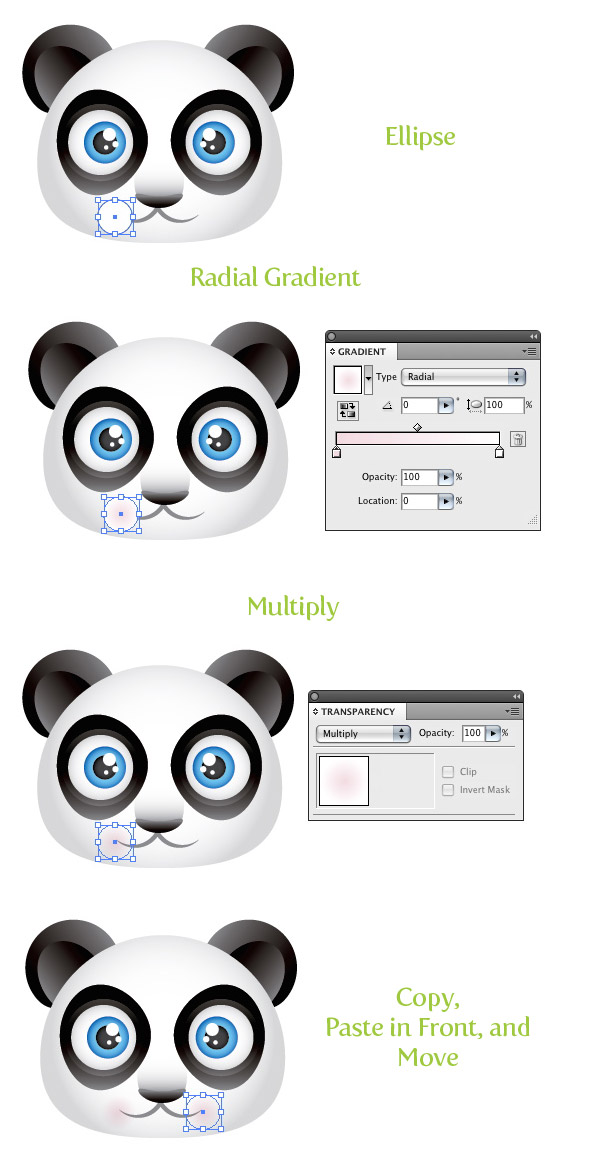
Step 21
Select the all the shapes in the panda face and go Object > Group. With the group selected, go Effect > Stylize > Drop Shadow. With the Drop Shadow dialog open, change the Opacity to 50, the X Offset to 0, the Y Offset to .05 in, the Blur to .07 in, and press OK.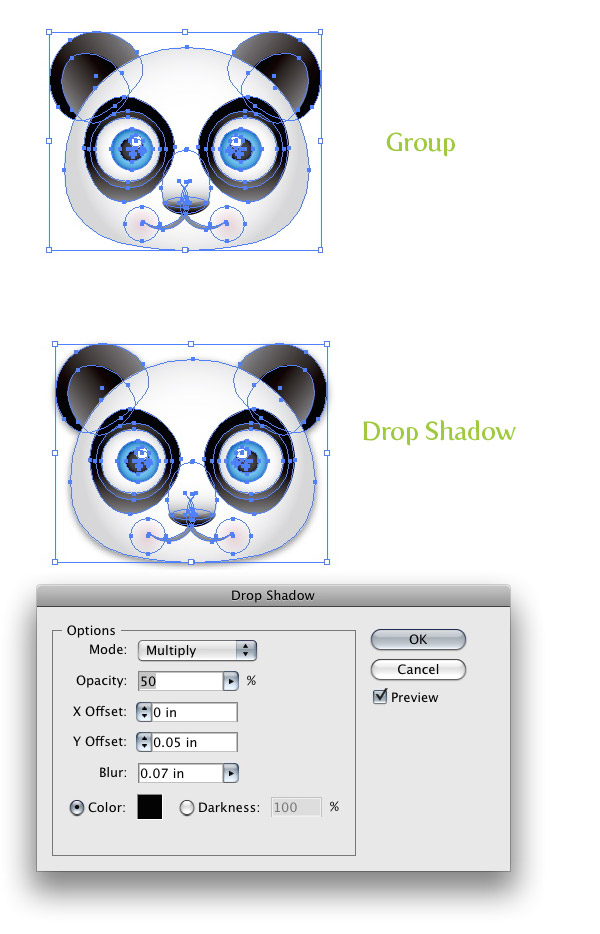
Step 22
Create a rectangle bigger than the panda face and fill it with a radial gradient. Make the first Color Stop white, and choose a different color for the second Color Stop.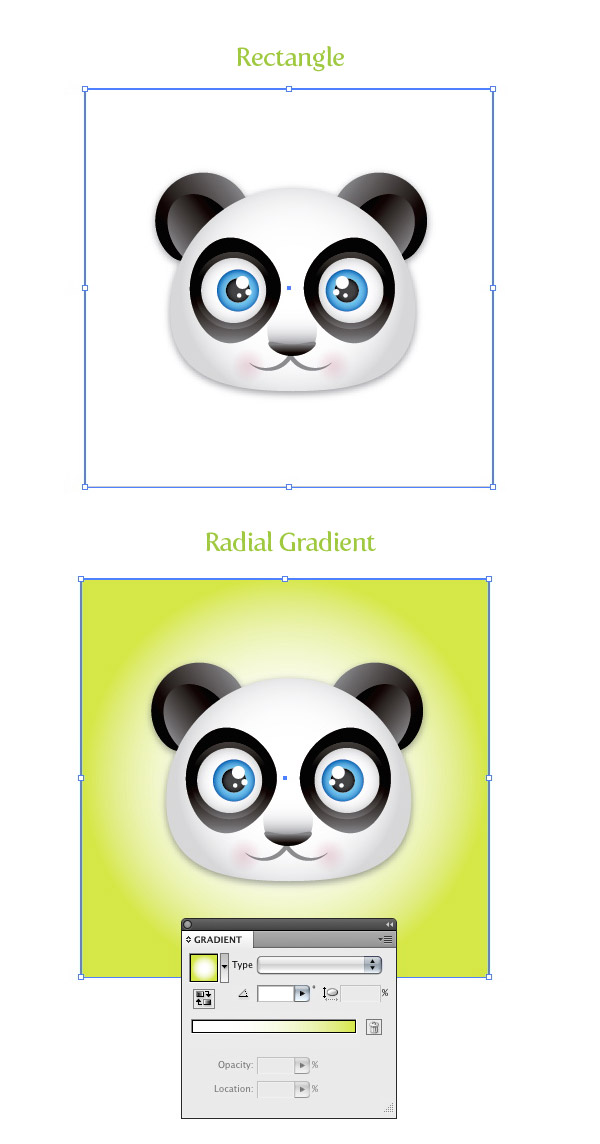
Final Image
All done! Wasn’t that easy? This tutorial is a good example of how some simple shapes can create a compelling illustration. Moreover, you can easily apply these techniques to other illustrations, logos, and projects!


No comments:
Post a Comment